Table of Contents
ToggleThe Ultimate Guide to Managing WordPress with cPanel DataBase Backup

“WordPress database backup cPanel management is essential for website security. In this comprehensive guide, you’ll learn how to use cpanel”
cPanel is a widely-used web hosting control panel that provides a user-friendly graphical interface and powerful tools to help users manage their websites and servers efficiently. Whether you’re a beginner launching your first WordPress blog or a developer maintaining multiple client websites, cPanel simplifies the technical aspects of web hosting.
With just a few clicks, you can manage your files, create email accounts, install WordPress, back up your website, manage databases, handle domains, and much more—all without needing to write any code or use complex command-line tools.
Thanks to its intuitive layout and integration with popular web technologies like Apache, PHP, MySQL, and WordPress, cPanel remains a go-to choice for website owners and hosting providers across the world.
How to Open cPanel (cPanel database backup for WordPress)
Accessing cPanel is easy once your web hosting account is active. Here are the common ways to open cPanel:
Replace yourdomain.com with your actual domain name.
You’ll be redirected to a login page where you enter your username and password (provided by your hosting provider).
Via IP Address (Advanced/Temporary Use)
If your domain isn’t live yet, you can access cPanel using your server’s IP address:
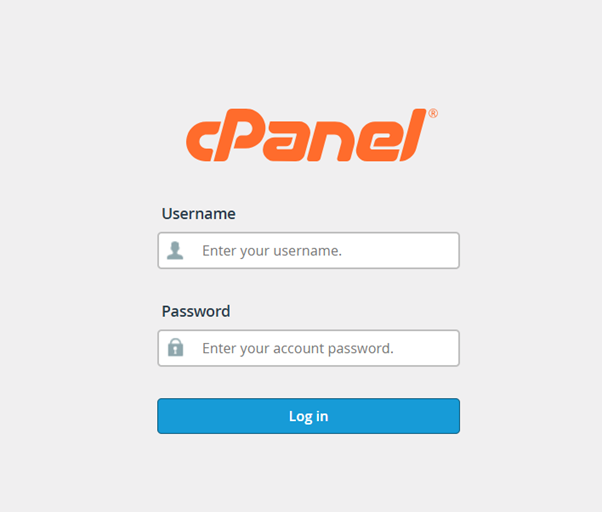
Logging into cPanel
Once you open the cPanel URL (like yourdomain.com/cpanel), you’ll see a login screen that asks for:
- Username
- Password
These credentials are usually provided by your web hosting provider via email after you purchase a hosting plan.
✍️ Steps to Log in:
- Enter your username (commonly “admin” or a custom name).
- Enter your password (from the hosting email or set by you).
- Click the “Log in” button.
If your login details are correct, you’ll be redirected to the cPanel dashboard.
🔒 Tip:
Always use HTTPS (secured connection) and avoid logging in over public Wi-Fi unless using a VPN for security.
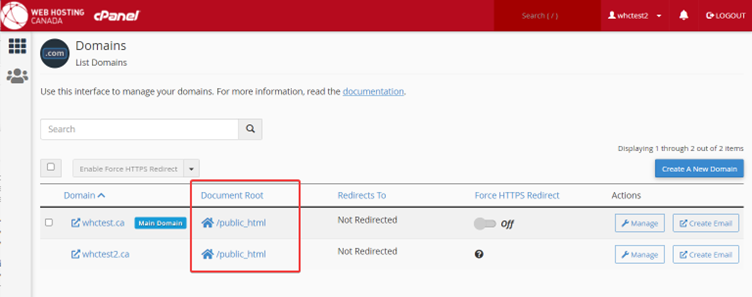
🔍 Step 1: Search for Your Domain Files
- In the cPanel dashboard, go to “File Manager.”
- Inside the “public_html” folder (or your domain folder), you’ll find all the files related to your website.
📁 Step 2: Select and Compress Files
- Select all the files and folders (excluding any existing .zip or .tar.gz backup files).
- Right-click and choose “Compress.”
- Select Zip Archive, name it (e.g., backup_June2025.zip), and click Compress Files.
⚠️ Important: If a backup file (like backup.zip) is already present, don’t include it in the new backup. Including it can lead to a larger and possibly corrupted backup.
⬇️ Step 3: Download the Backup
- After compression, right-click on the .zip file and click “Download.”
- Save it securely to your computer or cloud storage.
Find Database Username
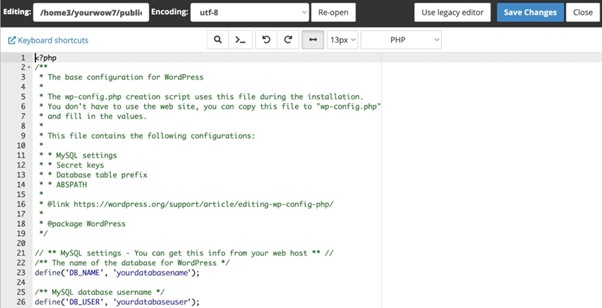
- Inside the file, look for the following line:
php
CopyEdit
define(‘DB_USER’, ‘your_db_username’);
- The ‘your_db_username’ part is your WordPress database username.
Copy the Username
- Select the username between the quotes and copy it (Ctrl + C or right-click > Copy).
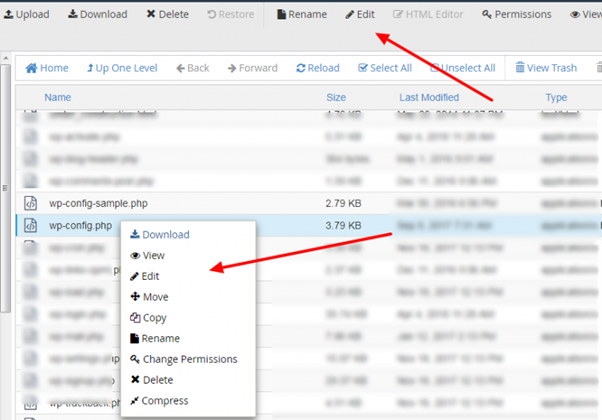
Find and Edit wp-config.php
- Locate the file named wp-config.php.
- Right-click on it → Click Edit (or View, depending on what you want).
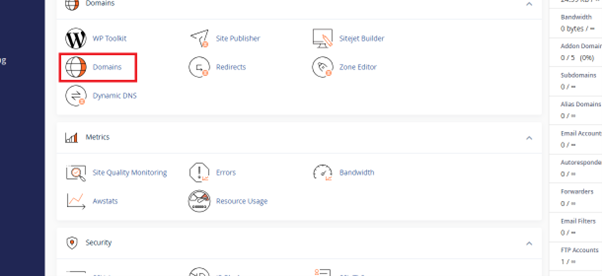
Go Back to cPanel Dashboard (cPanel database backup for WordPress)
- Click the cPanel logo or “Home” icon to return to the main dashboard.
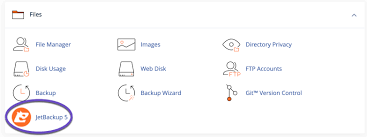
Look for “Backup” or “JetBackup”
- In the search bar at the top of cPanel, type:
backup
or
jetbackup - You may see one of the following:
- Backup (“wordpress database backup cpanel”)
- Backup Wizard
- JetBackup or JetBackup 5
If You See “Backup” or “Backup Wizard”:
Open the Backup Section
- Click Backup or Backup Wizard.
Look for Available Backups
- Find the “Download a MySQL Database Backup” section.
Search for Your Database Name
- Use Ctrl + F on your keyboard (for Windows).
- Type your database name (you copied it earlier from wp-config.php).
Download the Backup (“wordpress database backup cpanel”)
- If you find the correct database, click to download the .sql.gz file.
If You Don’t See a Backup There:
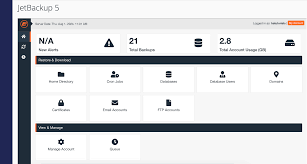
Open JetBackup
- Go back to the cPanel dashboard.
- Search for and click JetBackup (or JetBackup 5).
Look for “Database Backups”
- Inside JetBackup, choose “Database Backups”.
Find Your Database
- Again use Ctrl + F and search your database name.
Download the Backup
- If available, click the Download button next to it.
After Taking Backup – Continue With These Steps:
After Taking Backup – Continue With These Steps:
- Login to WordPress Dashboard
- Go to: yourdomain.com/wp-admin
- Enter your admin credentials.
- Update Everything
- Go to Dashboard > Updates
- Update all:
- ✅ Plugins
- ✅ Themes
- ✅ WordPress core (if needed)
- Check Security & Site Health
- Go to Tools > Site Health
- Fix any critical issues or recommended improvements.
- Use security plugins like Wordfence or Sucuri to scan your website.
- Review the Website
- Visit your website as a visitor.
- Check:
- Layout and UI
- Functionality (menus, buttons, links)
- Speed and responsiveness
❌ If Your UI is Broken or Scattered:
Sometimes, after updates or changes, your website’s UI may look scattered or broken. Here’s how to fix that from cPanel:
Step-by-Step Recovery:
- Go to cPanel > File Manager
- Navigate to public_html or the folder where WordPress is installed.
- Select All Files
- Click Select All, but DO NOT select any backup .zip files.
- Delete the Selected Files
- Delete everything except the .zip backup.
- Extract Your Backup .zip File
- Right-click the backup file → Click Extract.
- Wait for the process to complete.
🔑 Key Points to Remember
⚠️ Why Website UI Scatters After Maintenance:
- Incomplete or failed updates of core/theme/plugin files.
- CSS/JS files not loading properly (due to cache or corrupted files).
- Conflicts between new plugin versions and theme.
- Accidental deletion or overwriting of theme files.
📦 Why ZIP Backup Is Important:
- Acts as a full snapshot of your working website.
- You can instantly restore your website if something goes wrong.
- Avoids loss of data, images, and theme customization.
- Easy to extract and upload in File Manager.
✅ Final Checklist
Task | Status |
Backup Taken | ✅ |
Plugins & Themes Updated | ✅ |
Security & Site Health Checked | ✅ |
UI Verified | ✅ / ❌ |
Files Recovered (if needed) | ✅ (via .zip) |
[…] How to Manage WordPress with cPanel – Complete Beginner Guide […]